You may call it lacquer, shellac or varnish. I refer to it as polyurethane. Why I choose the most difficult word to spell or pronounce, I’m really not sure! Either way, polyurethane is a varnish, a resin dissolved in a liquid and applied to wood (or other materials). It’s pretty amazing stuff. It goes on easy, is relatively cheap and protects for years to come.
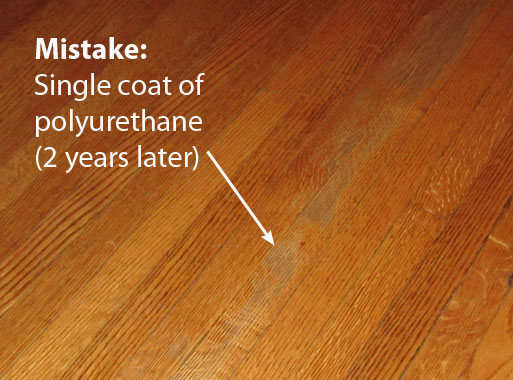
So, why do we finish coat our wood projects? I’ll answer that question with both fact and example. The example comes from our own home, many years ago. At the time, we not only had no experience in refinishing hardwood floors, but also no money. We rented the sander, re-stained the floors and put on a coat of polyurethane. That’s right, a single coat. Never, ever apply only a single coat of polyurethane to anything! This is what happens after only 2 years of regular foot traffic on our floors:
So, other than preventing physical wear on your wood components, why else is polyurethane a wonder-product?
- Reduces long-term UV damage (helpful if your finished product will be exposed to natural light – such as by a window, etc.)
- Resistance to water.
- Easier cleanup.
- Resistance to oils.
- Easy to apply and inexpensive.
- In most cases, it’s food safe once fully cured (unless it comes in contact with products that would dissolve it, such as alcohol).
Applying Polyurethane
There are numerous methods to apply polyurethane to wood. I have experience only with lambswool applicators and foam brushes. A lambswool applicator is ideal for finishing large surface areas, such as a flooring installation. It is larger than a traditional foam brush and can be attached to a pole to make it a little easier on your back.
I find using lambswool applicators a bit difficult on smaller projects, not to mention expensive if you can’t finish the job in one day. That being said, I usually opt for cheap foam brushes.
Unless you’re experienced, it’s a good idea to make sure your work piece is parallel to the floor when your applying the polyurethane. Even the thinnest of coats can run if left at the mercy of gravity. Apply a uniform thin coat using the foam brush, then let it dry for a few hours. I usually give it a whole day to dry between coats, but if you are in a hurry, you should be okay to sand after 4-6 hours.
What’s that? I need to sand after the first coat?
Yes. That’s the short answer. It seems counter-productive to run sandpaper over that perfect coat of polyurethane you just applied, but believe me, it’s worth it.
Some people will tell you that it’s not worth the time to sand between coats, as there’s no way to evenly create scratches for the polyurethane to sit by sanding. But, we’re not just doing it improve the bond (which it definitely does do). We’re also doing to sand down any imperfections or dust particles that made their way into the previous coat.
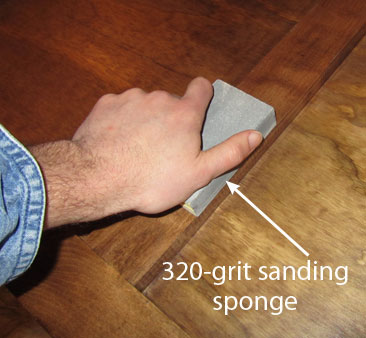
On hardwood floors, I usually go with a 220 grit as a finer grade won’t make much of a dent on such a large scale. For smaller projects, I use 320 or 400 grit, to ensure that I don’t remove too much of the previous coat.
After you’ve sanded, let the dust settle for a couple hours, than run a tack cloth across the entire surface.
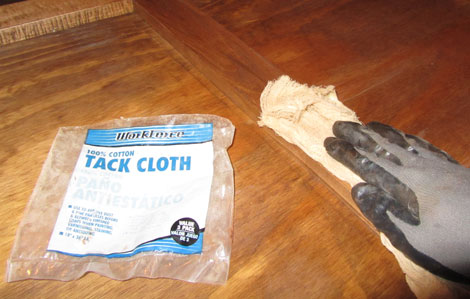
That’s it, you’re ready for the next coat!
How many coats?
This is subjective of course, but there’s a big rule of thumb. The more wear and tear you expect, the more coats you should apply. On walkable surfaces such as hardwood floors, do not go any less than two coats. We make it common practice to apply a minimum of four coats.
For projects in which light wear is expected, two coats may very well suffice and last you the rest of your life.
But, never, ever call your project complete with just one coat. I’ve done it before and have never learned a more cosmetically disastrous lesson!
Polyurethane Tips
- When you empty your pockets to buy that $40 gallon of polyurethane, take steps to keep it free of contamination by pouring a small amount into a disposable container for use. This is important especially if you’re using a foam brush, as pieces of foam tend to make their way off of the brush and into your polyurethane container (not to mention dust and larger wood particles).
- If you were going for a flat finish, don’t be alarmed when it looks bright and shiny right after application, that’ll go away!
- Don’t forget those “invisible” areas. If a portion of your project will be unseen, it still may make sense to apply polyurethane, especially if stain has made it’s way onto that unseen area.
Stain can be absorbed into any surface it comes into direct contact with, especially carpeting. So, be sure to cover it with polyurethane, if it is isn’t visible.
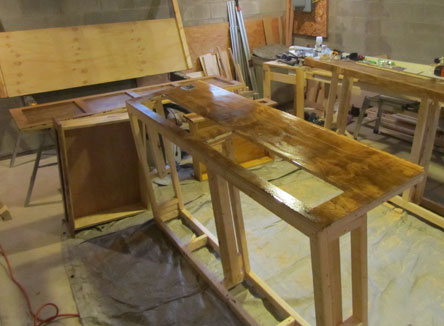
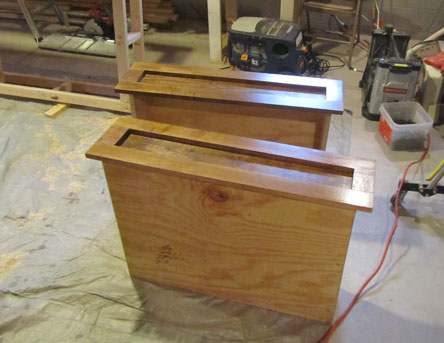
 If I were smarter, I would have planed the 7/8″ board down to 3/4″ with my thickness planer. I missed this detail though, and am left with a couple face frames with very uneven joints.
 Before we switch to a finer grit sandpaper, take that 60 grit and run it along any edges that might come in contact with human hands. It’s sounds funny, but wood is sharp, especially hardwood. If you’ve gone with a shaker-style look as I have, the edges will be sharp as a knife. I’ve actually cut myself on my cabinet drawer fronts, trying to open them before they had handles.