The magic behind drawers is their ability to slide in and out of their frame. Did I just blow your mind? The idea seems simple, but it’s one of the more difficult aspects of a cabinet or furniture project to pull off. The drawer can be difficult to open and close if the drawer box isn’t cut to the proper size, the shims aren’t of the proper thickness or the drawer isn’t level.
At a high level, putting drawer slides on a drawer is a two step process:
- Attach one half of the drawer slide to the drawer itself.
- Attach the other half to the frame (the opening that the drawer will sit inside of).
Before I do anything, I typically place the drawer inside the frame and just get an idea for approximately where I’d like the components to be attached.
For my projects, I almost always go with a 22″ Accuride Full Extension Slide Self-Close Slide. Accuride has been recommended by more than a few professional cabinet makers, so I trust them for just about all of my projects. The price is a touch steep, at about $15/pair, but I think you’ll find it to be a bargain when you compare them against the lower end “wheel guided” slides.
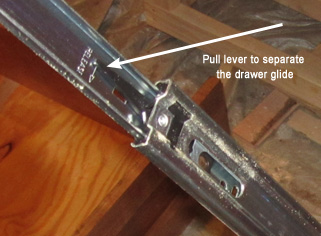 Before beginning either of the two steps above, you’ll need to separate the two halves of the glide. There’s a lever that you’ll pull, which allows the two halves to come apart, as shown to the right.
On the Accuride, this level is labelled “release”. Simply pull down in the direction of the arrow, then pull the two sections apart with just a little force.
Step 1: Attaching the Drawer Slide to the Drawer
We’ll start with the first step above, attaching the one half to the drawer itself. The piece with the “release” label is the one that we’ll be attaching directly to the drawer side. Once you’ve decided where you want to place it on the drawer, make a note of that measurement, as you’ll want to reproduce it on all drawers to ensure they are at the same finished height.
I typically drive three 3/4″ wood screws through the drawer glide and into the side of the drawer. Most recently, I was lacking 3/4″ wood screws, so I simply grabbed my bolt cutter and lopped the end off of some 1 5/8″ drywall screws, to get them down to 3/4″.
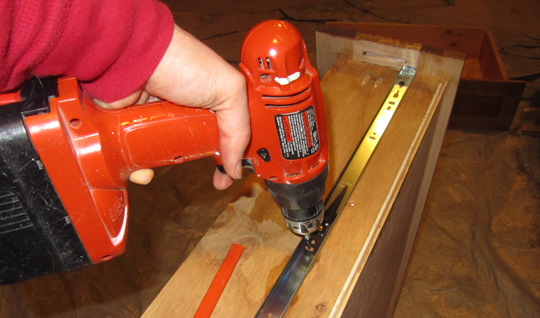
You’ll want to make sure that the end with a 90 degree angled piece is flush against the back of the drawer panel, otherwise, the drawer will not completely close.
I usually perform this step on all of my drawers before proceeding to the next step, to ensure that I keep consistent distance from the bottom of the drawer.
Step 2: Attaching the drawer slide to the frame
This is the step that takes time to master. In your first attempts, you’ll be able to get the drawer slides to function, but perhaps not as smoothly as they should. The 2×3 nature of the bed frame project will make it even more difficult as it take a lot more effort to make 2×3 frames square than traditional cabinet stock (3/4″ hardwood or plywood). Don’t be discouraged, and certainly don’t count the project as a failure if your drawers don’t slide in and out like a factory-made piece of furniture.
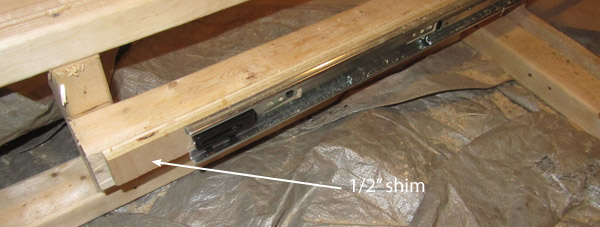
The first step is the attach the outer half of the drawer slide to the frame, as shown below. I typically use 3/4″ wood screws, but since the weight rating on these slides is only 100 lbs, I’ve also felt comfortable using 1 5/8″ standard drywall screws (they’re pretty “skinny”). The front of the slide should be inline with the finished surface of the frame, so the drawer closes snugly.
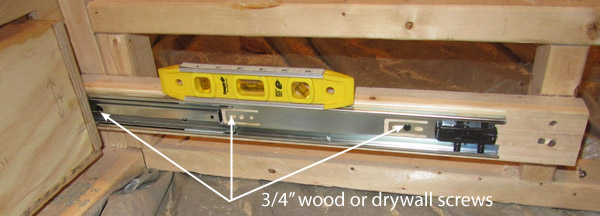
Repeat this for all of the drawer slides, making sure they’re all level and at the same elevation as each other (to ensure that the drawer fronts line up vertically).
Remember that your drawer opening should be 1 1/16″ wider than the drawer itself. If it is wider than it should be, you can insert a shim to fill the gap. Plywood of varying thickness makes great shimming material.
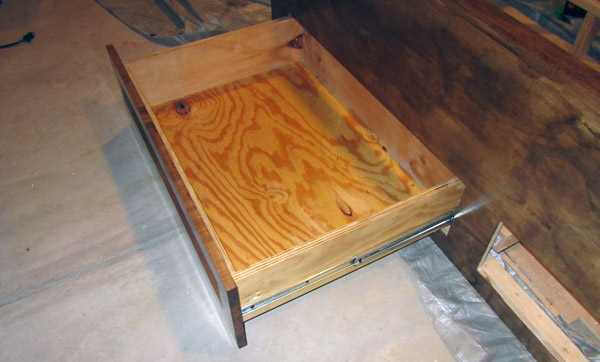
Once you have all the slides in place, push the drawers into the slides you’ve just attached. You may need to give a little force on the initial entry, but afterwards, it should slide relatively smoothly within the tracks.
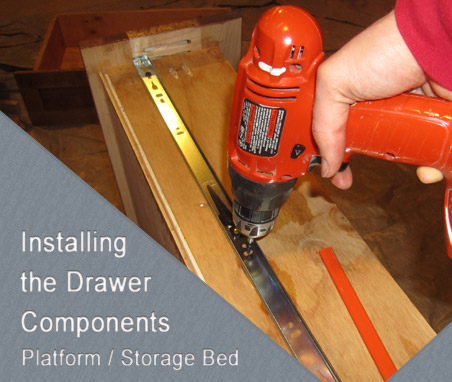
Installing the Bed Frame Drawer ComponentsBonus Tips & Tricks
This post has a Tips & Tricks section to supplement the main article above.
Like, Tweet or Google+ this page to see these tips.