I’ve made drawer boxes in a few different ways throughout various projects. Admittedly, I’ve never taken the time to learn how to create dovetail joints. I typically go for the pocket hole joinery method. The drawers I’ve made using this method have been in regular service for almost 4 years now, without the slightest indication that they’re not functioning 100%.
For a novice, drawer construction is probably the most time consuming and thought provoking process of a given project. If not the construction itself, making sure the dimensions for the drawer opening, box, front and glides are all correct adds a level of difficulty that takes almost any simple project to the next level.
When I start thinking about how the drawers will fit into the project, I take one of two approaches:
- The drawer opening dimensions are more important than the dimensions of the drawer.
For example, if the only deciding factor is that you need to have the drawers centered and equally “padded” from all sides of the frame.
In this situation, frame out, or cut out the drawer opening first. - The drawer box dimensions are more important than the opening dimensions.
For example, if you need to fit a certain size object in the drawer, the dimensions of the drawer box itself should be the deciding factor in the design.
In this situation, build the drawer first.
 A seasoned woodworker may not take either approach, as they can easily conceptualize how everything will fit together. For the beginner, it’s usually easier to have one piece of the puzzle in place first, before working on the next one.
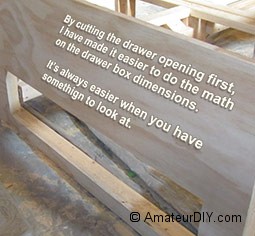
In my current project, the platform bed, it is more important that the drawers fill the width of the opening provided by the bed frame. So, I cut the drawer openings first. Having this done, it’s much easier to come up with the dimensions of the drawer box itself.
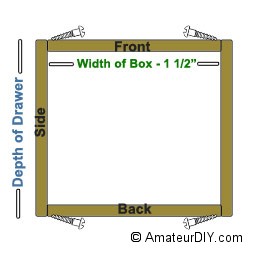
Now that we have our opening, the dimensions of the box is simple arithmetic:
Drawer Box Width = Drawer Opening Width – (Drawer Slide Thickness * 2) – 1/16″
Drawer Box Height = Drawer Opening Height – 1/2″
Now, let’s explain. The height is pretty simple, we want 1/4″ clearance on the top and bottom of the drawer, so it doesn’t rub against the frame. The width, however, depends on your drawer slides. You’ll need to know ahead of time what glides you’ll be using. I have used the Accuride 22″ Full Extension Self-Close Slide in just about every one of my projects. Accuride is a trusted name, they’re affordable, the full extension is well worth it and the self-closing action “grabs” the drawer and pulls it shut when you get within about an inch of the frame. Not to mention, 22″ will fit a 24″ depth opening very nicely; 24″ is one of the most common opening depths.
The Accuride slide is 1/2″ thick, which is enough to give it that 100 lb. rating, while not being so thick that it significantly reduces your drawer width. I like to give the drawer slides a combined extra 1/16″ to work with, as seen in the formula above. They seem to slide more smoothly that way.
Drawer Sides, Front & Back
 Now that the dimensions are out of the way, let’s get to the construction. If you have a lot of boxes to make, be smart about how you cut your plywood (assuming you’re not using solid wood). Drawer boxes use a lot of material (4 sides, a bottom and a face), so it’s important to get the most out of your 4×8 plywood sheets.
The drawer front and back will width will be determined by the thickness of your wood, typically 3/4″.
Front/Back Width = Box Width – (Thickness of Wood * 2). Typically, Box Width – 1 1/2″
Cut your pieces then join them with pocket hole joinery. Screw into the rear of the back panel, as it won’t be visible. How you attach the front depends on your drawer face. If you are using a frame and panel face, you’ll want to screw into the outside face of the front panel, as it will be covered by the drawer front finishing piece. However, if you’re using a simple face frame method, as I am, you need to screw into the inside of the front panel. They’ll be visible on the inside of the drawer box, but that’s not a big deal for most people.
Drawer Bottom
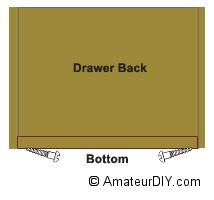 Wait! Before you screw the sides, front and back together, you need to consider how you’ll be joining the drawer bottom to the box. The method I like best is to rabbet a groove around the inside perimeter of the drawer box, which the drawer bottom can “slide” into. If using this method, you need to cut the groove with a router, then slide the bottom into place before you completely screw the box together. This method is more intermediate, takes time, and requires router skill. If this is your first project, I’d suggest taking the easier route and simply screw the bottom to the box.
You can create pocket holes on the underside of the drawer bottom, then pocket hole screw it to the box. Or, if you cut the bottom to the full width and depth of the drawer box and wood screw it directly to the bottom of the box (through the plies). Remember, if you take this approach, your drawer sides, front and bottom need to be 3/4″ shorter than previously calculated.
Drawer Face
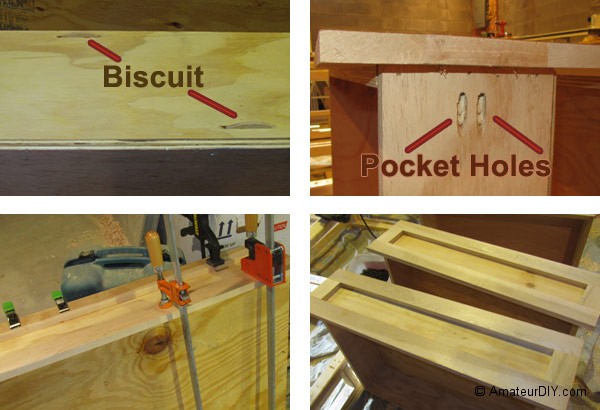
And finally, the finished face of the drawer. Unless your guests have a bad habit of walking in and opening all of your drawers, this is the part that most people will see. There are so many techniques to creating drawer fronts, I’ve used only a few. By far, the easiest method is to simply create a face frame and attach it to the drawer front panel. The frame stiles and rails need only be thick enough to cover the visible plies on the plywood and the drawer opening. 2″ stiles and rails is typically enough for this purpose.
I prepare the face frame parts, then put them together with pocket hole joinery. Once that’s complete, I choose to attach the face frame with biscuits and pocket hole screws. If you don’t have a biscuit joiner, you can always attach it with wood screws drilled through the inside of the front panel and into the back of the face frame, perhaps coupled with pocket hole screws on the sides.